In this tutorial, we’re going to create a Spring Boot users REST API from scratch. Without further delay, head to the Spring Initializr website (click here):
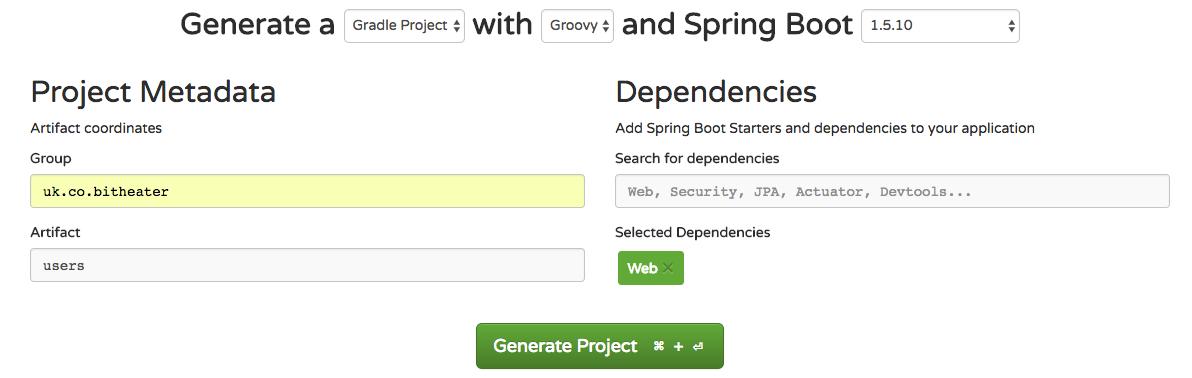
Fill the basic information (group, artifact) and add the Web dependency, as we’re planning to use a REST API.
We’ll be using Gradle (Spring Boot supports Maven, too) and Groovy (Java and Kotlin are supported), but you can use whatever you feel more comfortable with.
Once you’ve filled the form, generate the project. It’ll download a ZIP file.
$ unzip users.zip
$ cd users
$ ./gradlew bootRun
We’re done! Spring Boot is able to start the application, and it’s even listening on port 8080. But we have configured no controller to be listening, so any HTTP request will return 404. Let’s create our first endpoint.
Open the project on your favourite editor (we use IntelliJ) and create your user model:
package uk.co.bitheater.users

class User {
    int id
    String name
    String email
}
A simple user class, with an identifier, a name and an email. Now let’s create a controller with some users in-memory:
package uk.co.bitheater.users

import org.springframework.http.HttpHeaders
import org.springframework.http.HttpStatus
import org.springframework.http.ResponseEntity
import org.springframework.web.bind.annotation.DeleteMapping
import org.springframework.web.bind.annotation.GetMapping
import org.springframework.web.bind.annotation.PathVariable
import org.springframework.web.bind.annotation.PostMapping
import org.springframework.web.bind.annotation.PutMapping
import org.springframework.web.bind.annotation.RequestBody
import org.springframework.web.bind.annotation.RestController

@RestController
class UserController {
    def users = [
            1: new User(id: 1, name: 'User 1', email: 'user1@gmail.com'),
            2: new User(id: 2, name: 'User 2', email: 'user2@gmail.com'),
            3: new User(id: 3, name: 'User 3', email: 'user3@gmail.com')
    ]

    @GetMapping('/users')
    def get() {
        return users.values()
    }

    @GetMapping('/users/{id}')
    def get(@PathVariable("id") int id) {
        return users.get(id)
    }

    @PostMapping('/users')
    def add(@RequestBody User user) {
        users.put(user.id, user)

        def headers = new HttpHeaders()
        headers.set('Location', "http://localhost:8080/users/$user.id")
        return new ResponseEntity<>(headers, HttpStatus.CREATED);
    }

    @PutMapping('/users/{id}')
    User edit(@PathVariable("id") int id, @RequestBody User user) {
        users.put(id, user)
        return users.get(id)
    }

    @DeleteMapping('/users/{id}')
    def delete(@PathVariable("id") int id) {
        users.remove(id)
        return new ResponseEntity<>([], HttpStatus.NO_CONTENT);
    }
}
We’re using some annotations here:
@RestControllerto automatically register our bean as a controller (REST, in our case, so it’ll automatically do any JSON processing for us)@GetMapping,@PostMapping,@PutMappingand@DeleteMappingto associate operations with their custom controller method, depending on the HTTP verb used
We’re basically transforming and playing around with an in memory map of users, and we trust our API users not to do crazy things. At the end of the day, this is just a demo!
We can run again our application, and test the endpoints easily using CURL:
$ curl http://localhost:8080/users
$ curl http://localhost:8080/users/1
$ curl -XPOST http://localhost:8080/users -H "Content-Type: application/json" -d '{"id": 4, "name": "Test", "email": "test@test.com"}'
$ curl http://localhost:8080/users/4
$ curl http://localhost:8080/users
$ curl -XPUT http://localhost:8080/users/4 -H "Content-Type: application/json" -d '{"id": 4, "name": "Test Edited", "email": "test@test.com"}'
$ curl http://localhost:8080/users
$ curl http://localhost:8080/users/4
$ curl -XDELETE http://localhost:8080/users/4
$ curl http://localhost:8080/users
We were very quickly able to:
- Query all users
- Query a single user
- Add a user
- Edit the user
- Delete the user
We’re done! By just creating a couple of files and no configuration at all, we’re created the simplest possible RESTful API using Spring Boot. So easy!